Imagine this: a patient eagerly awaits their new crown, anticipating a perfect smile. However, upon delivery, their excitement turns to disappointment. The shade of the crown starkly contrasts with their natural teeth, creating an unattractive look. This all too familiar scenario in dental practices underscores the critical importance of mastering shade communication. A slight mismatch can lead to significant patient dissatisfaction, requiring costly and time-consuming adjustments.
Achieving a natural-looking smile with prosthetic restorations like dental implants hinges on a crucial factor: accurate shade matching. While technical expertise in preparation and placement is paramount, precise communication between the dentist and the dental laboratory regarding the desired tooth shade is equally vital. This intricate dance between clinician and technician relies on a shared understanding of colour fundamentals, effectively utilising shade guides and the power of visual communication.
This comprehensive guide is not just a theoretical exploration of shade communication. It is a practical tool that will equip you with techniques and insights to master shade communication. This mastery will lead to predictable and aesthetically pleasing restorations, enhancing your professional skills and career growth. Rest assured, these are not just theoretical concepts but practical advice that you can start using in your practice today.
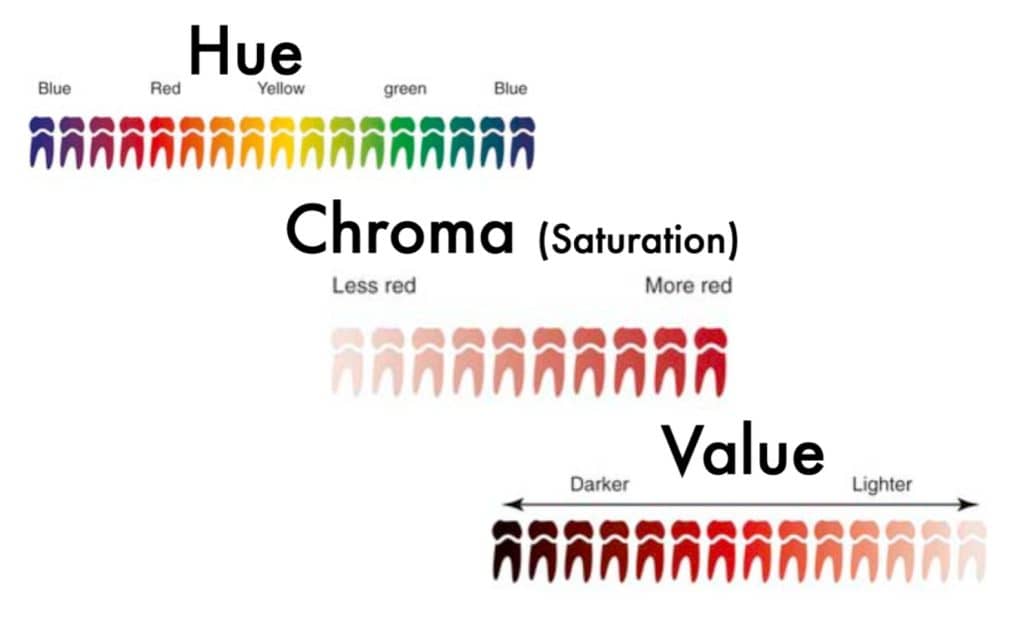
Before delving into the specifics of shade matching, let's establish a common language by understanding the three fundamental elements of colour:
Hue: The Foundation of Colour
Hue refers to the primary colour family, like red, blue, or yellow. Dentistry primarily focuses on yellow and brown hues when describing tooth shades.
Chroma: The Intensity Factor
Chroma describes the intensity or saturation of a colour. A vibrant, highly saturated tooth colour has high chroma, while a duller shade has lower chroma.
Value: The Lightness Dimension
Value represents the lightness or darkness of a colour. Teeth typically range from light to medium value, with variations influenced by age, translucency, and individual characteristics.
Shade guides are not just tools; they are your pathway to success in shade communication. This comprehensive guide will equip you with practical techniques and insights to master shade communication for predictable and aesthetically pleasing restorations, with shade guides pivotal in this process. Shade guides are essential tools that provide standardised colour references for dentists and labs. Two widely used shade guides are:
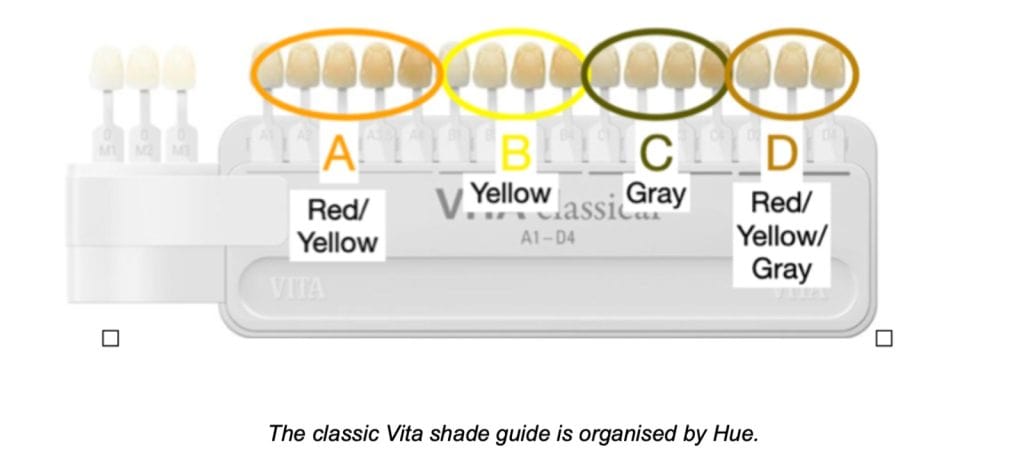
VITA Classic: The Industry Standard
The VITA Classic shade guide is organised by hue, offering a spectrum of 16 shades ranging from A1 (lightest) to D4 (darkest).
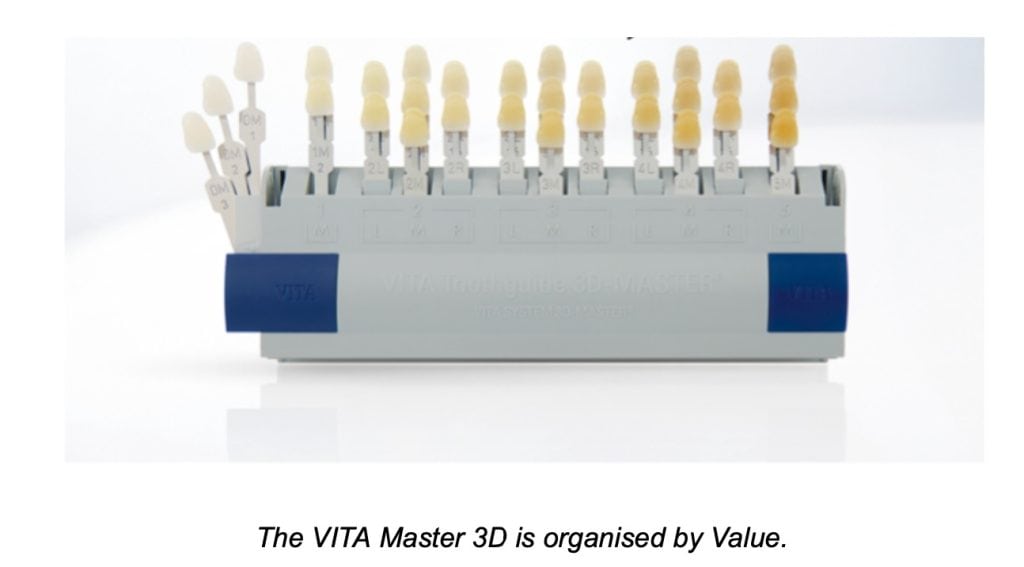
VITA 3D Master: Expanding the Palette
The VITA 3D Master shade guide organises 26 shades based on lightness (value), chroma, and hue, providing a more comprehensive range for precise shade selection.
Choosing the Right Shade Guide for Your Practice
Consider the materials you frequently use, the complexity of cases you handle, and your budget. Consulting with your dental lab can also be beneficial.
Accurate shade-taking is both an art and a science. Here are essential steps to guide you:
The Importance of Natural Lighting
Natural daylight offers the most accurate representation of tooth colour. Position your patient near a window for optimal lighting conditions.
Seven Steps to Accurate Shade Matching (adapted from Vimal K Sikri):
Avoiding Common Shade-Taking Pitfalls
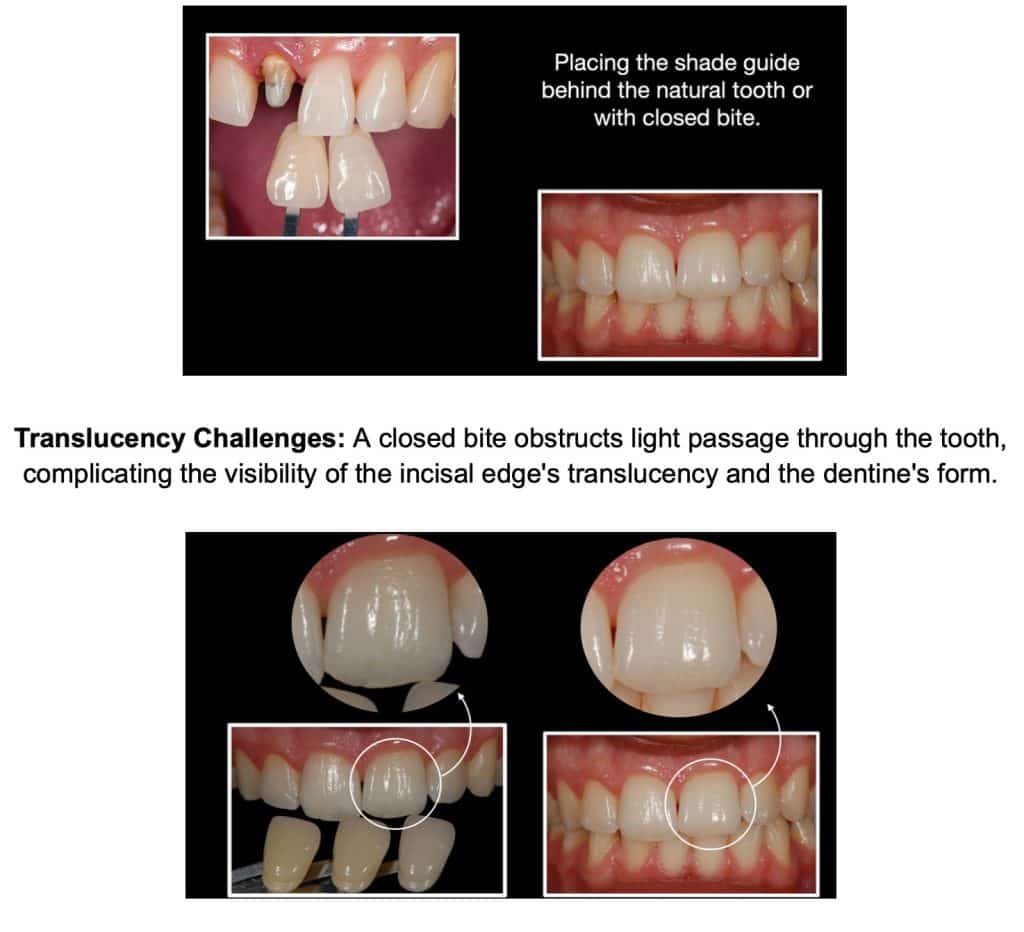
High-quality photographs are invaluable for conveying shade information to the lab.
Capturing the Perfect Shade Photo
Preparation Photos: Guiding the Framework Design
Composite Buttons: Providing a Physical Reference
(Include examples of helpful preparation photos and composite buttons.)
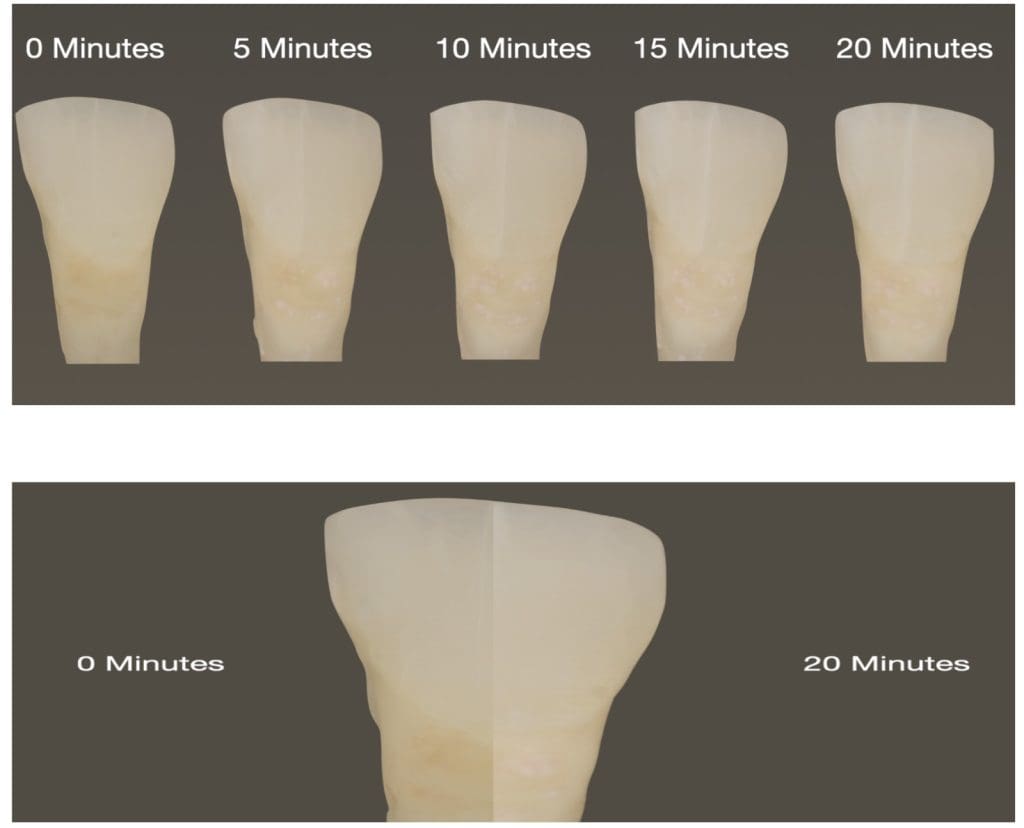
Tooth dehydration can significantly impact shade perception, leading to inaccurate shade matching.
How Dehydration Affects Tooth Shade
As teeth dehydrate, they become lighter and appear whiter, potentially resulting in a restoration that is too bright.
Timing is Key: Take Shade Photos First
Take shade photos at the very beginning of the appointment, before teeth have a chance to dehydrate.
Minimising Dehydration During Procedures
Open communication and collaboration are essential for achieving predictable aesthetic outcomes. As a dentist, your role is crucial in this process. Your partnership with the dental lab is integral. Together, you can create restorations that exceed patient expectations. Your active involvement and clear communication can significantly impact the outcome.
Open Communication: The Foundation of Success
Collaboration: Working Together for Optimal Results
Q1: What is the best way to choose the right shade guide for my practice?
A1: Consider factors like the materials you frequently use, the complexity of cases you handle, and your budget. Consulting with your dental lab can also be beneficial.
Q2: How can I improve the quality of my shade photos?
A2: Use a dedicated dental camera with a macro lens, ensure proper lighting and camera positioning, and use a contrasting background.
Q3: What should I do if the shade of the restoration doesn't match perfectly after trying it in the patient's mouth?
A3: Communicate with your lab immediately and provide clear photos and descriptions of the discrepancy. Avoid making adjustments yourself unless necessary.
Q4: How can I explain the importance of shade matching to my patients?
A4: Use before-and-after photos of successful cases and visual aids to illustrate colour concepts and emphasise the impact of a natural-looking smile on their confidence.
Q5: What are some tips for building a solid relationship with my dental lab?
A5: Communicate openly and frequently, provide clear instructions and feedback, and respect their expertise.
Hopefully, you have taken something from this article and realised mastering shade communication is an ongoing journey requiring dedication, attention to detail, and continuous improvement. By embracing the principles and techniques outlined in this guide, clinicians can elevate their skills, strengthen their partnerships with dental labs, and consistently achieve exceptional aesthetic outcomes that leave patients smiling with confidence.
Ready to elevate your shade communication and achieve predictable aesthetic results? Contact our expert team at Nexus Dental Lab today. We're here to partner with you in creating restorations that exceed your patients' expectations.
